So Big Al joins Aloysius. Excellent!
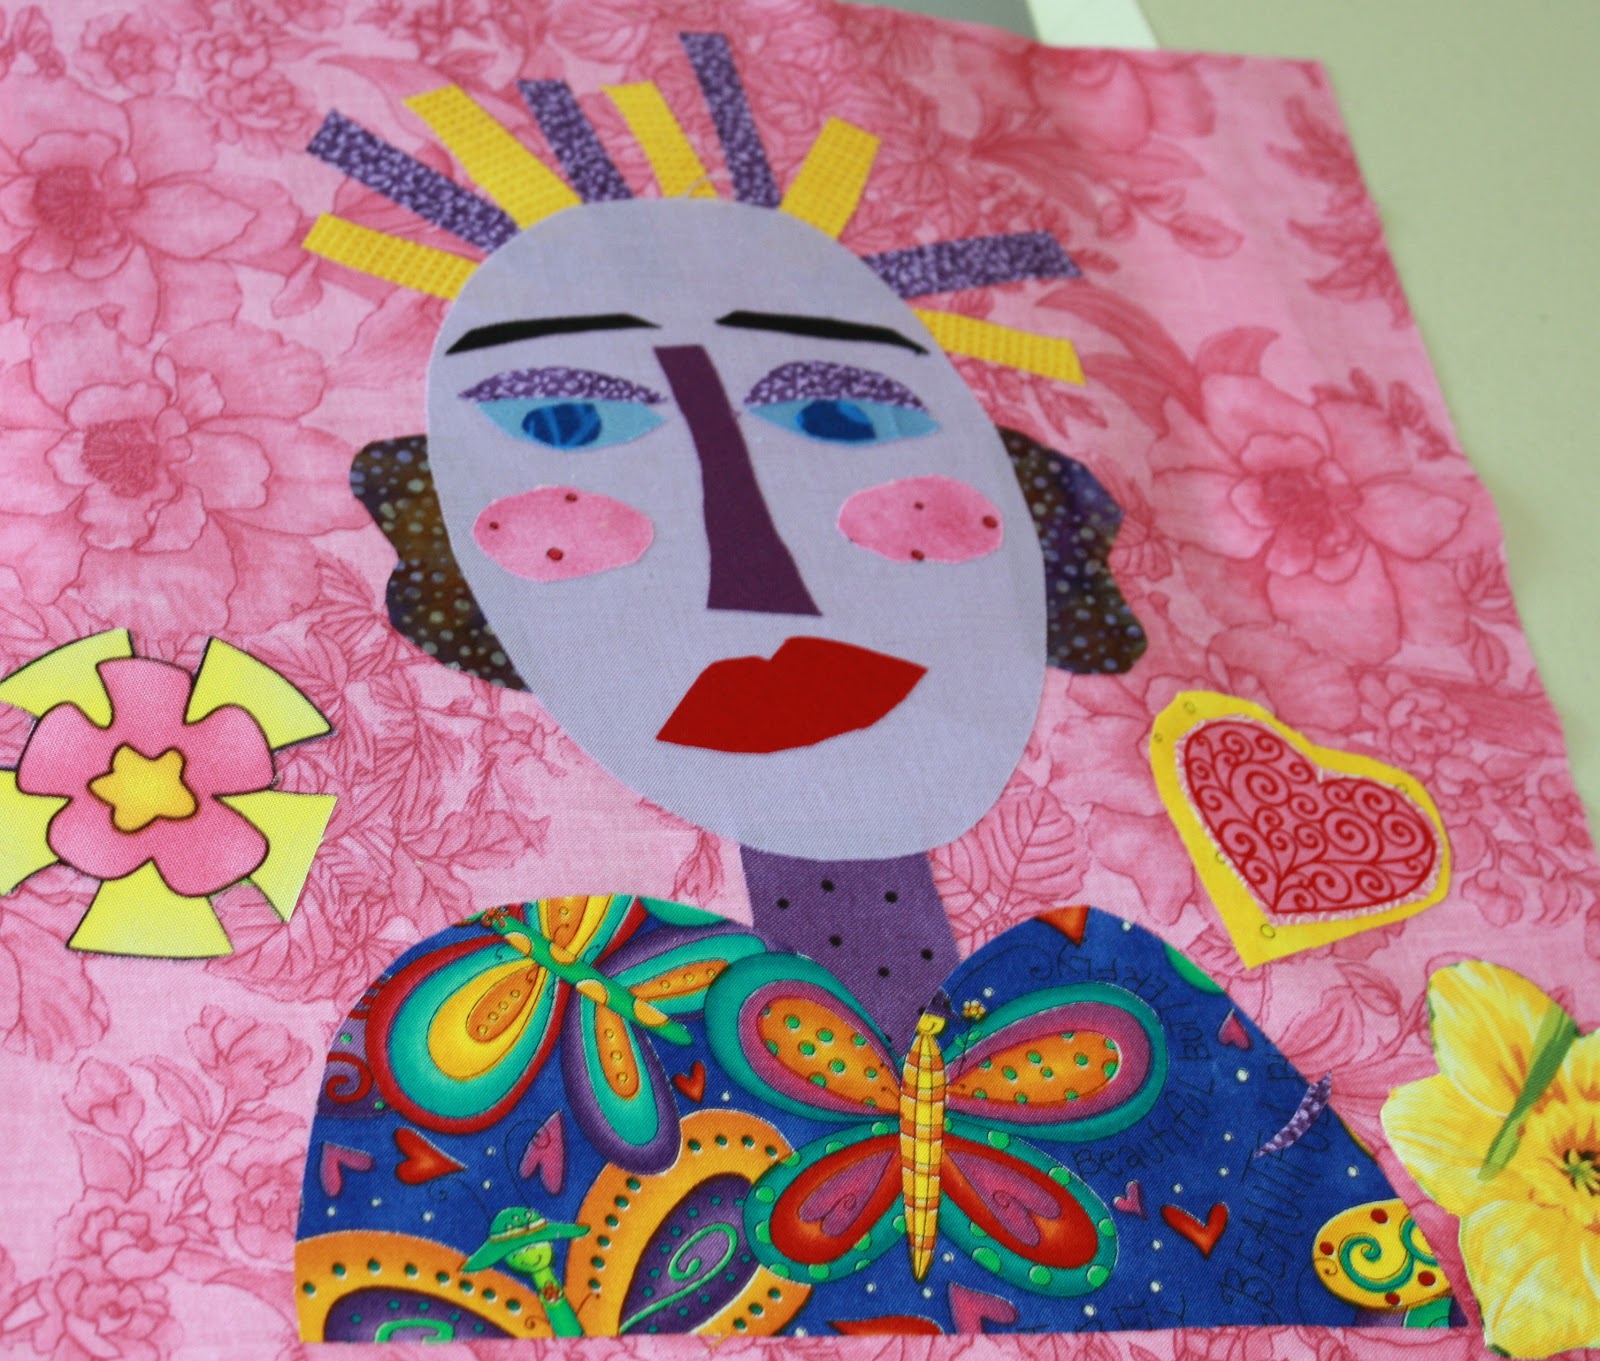
I decided to follow my instincts and create a second quilt following the same pattern but in completely different colors. And Big Al was born. I like him a lot.
This is what he looked like before any detail was added.
And here he is all finished.
For your amusement, here are Big Al and Aloysius together. They do look like brothers don't they? But their personalities are SO different. Big Al looks like he would be fun at parties - and Aloysius looks like he would have all the answers to ALL the questions. This was a fun project and will serve as good examples for my class in March at Sew Unique.
The class will be an all-day class. We will learn to make squiggly drawings and then choose our favorite, learn an easy way to make the drawing the size that we want, select fabrics and learn about fusible web quilting, and construct the front of the quilt including stitching the design down. We probably won't have time to do the actual quilting but the students can do that at home. I think it will be an intense but very FUN day.... barbara
Jan and Barbara are TWO art quilters living in the middle of a very traditional Ozark area. Some folks think we are TOO wild but we have a lot of fun. We decided we needed a place to PLAY and EXPERIMENT and just share ideas. Come see what we are doing lately - and join the conversation!
Thursday, January 3, 2013
Saturday, December 22, 2012
Aloysius
I made a scribble drawing quite a while ago - always liked it - but never got around to making it into a quilt. The other day I was thinking of new classes to teach - and decided to return to that particular box of ideas - and found this little guy. This is a scan of the original index card drawing.
It was really challenging to find the right fabrics. I knew that the little guy looked rather reptilian - maybe a turtle or something..... so I found the perfect reptile fabric right away. But to find the other fabrics? Took a bit of trial and error. Here is what he looked like when he was fused to the background but no stitching yet to define his personality.
Notice how his chin doesn't stand out from the neck (fixed that with paint) and his left eye blends into the background. Not good.
This is what I call the "ugly stage" of this type of quilt. It is hard to imagine how much better it will look with the stitching to define the details of the design. I chose a very close black zigzag in order to really make the design stand out - and make it sort of look like it was a "drawing".
And here is what Aloysius looks like when he is all done and has borders and quilting complete. Much better don't you think?
I think that Aloysius looks sort of intellectual. Like he may have some wisdom to share. He also looks like he may need to be part of my Farkleberry series.
I think my next project may be to do the exact same design in bright colors. To show the difference - which I am guessing will be pretty significant. We will see..... barbara
It was really challenging to find the right fabrics. I knew that the little guy looked rather reptilian - maybe a turtle or something..... so I found the perfect reptile fabric right away. But to find the other fabrics? Took a bit of trial and error. Here is what he looked like when he was fused to the background but no stitching yet to define his personality.
Notice how his chin doesn't stand out from the neck (fixed that with paint) and his left eye blends into the background. Not good.
And here is what Aloysius looks like when he is all done and has borders and quilting complete. Much better don't you think?
I think that Aloysius looks sort of intellectual. Like he may have some wisdom to share. He also looks like he may need to be part of my Farkleberry series.
I think my next project may be to do the exact same design in bright colors. To show the difference - which I am guessing will be pretty significant. We will see..... barbara
Thursday, December 13, 2012
Laughter for the Soul
My sister-in-law Jeanne lives in Milwaukee and is a wonderful creative artist who works with all sorts of different groups in Milwaukee. She is also one of the people that I really admire for the way that she brings ART to people who would not necessarily experience it - in a gentle and fun way.
I was able to contribute some bits and pieces of fibers and other things for Jeanne to use with her classes. This is a photo of an intergenerational project that she recently completed - and her explanation.....
"Our theme was Laughter for the Soul. The totems are supposed to represent that theme using art from both the kids and adults. How did we decorate the boxes ? Well, I had the kids doing little art pieces - Picasso Dogs, Funny Faces, Stuart Davis collages and silly ice cream deserts.
The adults embellished large pieces of watercolor paper using paint, pastels and your threads and fabric. They also made some funny faces using paper and your materials. Both adults and children then got together to paint the boxes and modgepodge all the art on them. We also did some weavings that I sandwiched in between the boxes.
My supervisor at Danceworks set a short piece of a pole in cement in a very large coffee can and then we got narrower poles of about 5 feet that fit in the can. We were instructed to just string the boxes on the poles but not affix them together so the pieces could be reassembled and put together again.
Believe me it was something to see when I was trying to organize all of this at the nursing home with 50+ people and volunteers. It went really well and I did not even get anxious. It is nice to be able to go with the flow, a skill that took me many years to develop. One of the things I love about being older is that I am no longer judging myself constantly like I did when I was young. I guess my brain just doesn't have the energy for that anymore. "
I love the look of the Totem - and am trying to think of a way to try this in Arkansas. Thanks for the inspiration Jeanne!!!! barbara
I was able to contribute some bits and pieces of fibers and other things for Jeanne to use with her classes. This is a photo of an intergenerational project that she recently completed - and her explanation.....
"Our theme was Laughter for the Soul. The totems are supposed to represent that theme using art from both the kids and adults. How did we decorate the boxes ? Well, I had the kids doing little art pieces - Picasso Dogs, Funny Faces, Stuart Davis collages and silly ice cream deserts.
The adults embellished large pieces of watercolor paper using paint, pastels and your threads and fabric. They also made some funny faces using paper and your materials. Both adults and children then got together to paint the boxes and modgepodge all the art on them. We also did some weavings that I sandwiched in between the boxes.
My supervisor at Danceworks set a short piece of a pole in cement in a very large coffee can and then we got narrower poles of about 5 feet that fit in the can. We were instructed to just string the boxes on the poles but not affix them together so the pieces could be reassembled and put together again.
Believe me it was something to see when I was trying to organize all of this at the nursing home with 50+ people and volunteers. It went really well and I did not even get anxious. It is nice to be able to go with the flow, a skill that took me many years to develop. One of the things I love about being older is that I am no longer judging myself constantly like I did when I was young. I guess my brain just doesn't have the energy for that anymore. "
I love the look of the Totem - and am trying to think of a way to try this in Arkansas. Thanks for the inspiration Jeanne!!!! barbara
Monday, December 10, 2012
Little Tiny Quilts Keep Appearing
Apparently I am working on a series of little tiny face quilts! It started when I needed to make the SAQA swap quilt postcard size - and I enjoyed it so much that I keep making the little guys! They are quick and fun and a great way to use scraps. I think that some of them (if I can convince myself to give them away) will be Christmas presents. We will see.....
Anyway. I took a photo of two of them after I finished the initial step but before any stitching was done. I wanted to see the contrast of before and after stitching. See what you think.

So now I bet you are curious to see the other little guys that have appeared on my wall..... here they are......
I do think that I need to move on to another project - but these little guys are sort of addictive! barbara
Anyway. I took a photo of two of them after I finished the initial step but before any stitching was done. I wanted to see the contrast of before and after stitching. See what you think.

So now I bet you are curious to see the other little guys that have appeared on my wall..... here they are......
I do think that I need to move on to another project - but these little guys are sort of addictive! barbara
Monday, December 3, 2012
Julie Quilt
The day after Thanksgiving we went to a lovely party at our friend Jim's house. Jim and his friends are great cooks and they served the most delicious turkey gumbo. We really have a lot of fun with these folks and it was a good party.
Well - here is where this story winds its way to quilting and being posted on this blog.....
After copious amounts of wine and laughter and music - we decided that it would be fun to do a group art project. Betsy passed around large pieces of paper and pencils and played some music and we each drew marks and shapes that were inspired by the music. Betsy is an Art Teacher and I wish that I could be in one of her classes - she has GREAT ideas!!
Then, when the music stopped, the person with the drawing had to look at it and see if they could find a picture within the drawing. Mine turned out not so good. Some of the others were fun to see. But the one that I just LOVED was the one that Julie made. It was such a charming creature and I fell in love as soon as I saw it. I asked if I could make it into a quilt - and Julie said OK.
This is a photo of the original drawing (size 14" x 17" ).
An interesting note: Julie, in addition to her regular job, is also an artist and had shown me two of her paintings at Jim's house. Both charming and very colorful. But she has never seen my art - so I think she was very brave to let me have her drawing.
So the next day I crept into the studio where I had placed the drawing after the party - hoping that I would still find it absolutely charming even when I was completely sober. And of course I did.
I had a great time making the quilt. It is the exact size of the original drawing. Of course I had complete freedom to add color since it had none to start with. The first draft colorwise had a green face - but that was really ugly and sort of scary looking. You can see from this photo that before the stitching, it was really hard to distinguish the face from the background.
Here is the piece with the initial stitching done - looks a LOT better.
.jpg)
And here is the quilt - all done and ready to give to Julie. Here is a secret: I love love love this quilt and it will be hard to send it on its way. But isn't that just the greatest compliment to a quilt? That you love it when it is done? barbara
Well - here is where this story winds its way to quilting and being posted on this blog.....
After copious amounts of wine and laughter and music - we decided that it would be fun to do a group art project. Betsy passed around large pieces of paper and pencils and played some music and we each drew marks and shapes that were inspired by the music. Betsy is an Art Teacher and I wish that I could be in one of her classes - she has GREAT ideas!!
Then, when the music stopped, the person with the drawing had to look at it and see if they could find a picture within the drawing. Mine turned out not so good. Some of the others were fun to see. But the one that I just LOVED was the one that Julie made. It was such a charming creature and I fell in love as soon as I saw it. I asked if I could make it into a quilt - and Julie said OK.
This is a photo of the original drawing (size 14" x 17" ).
An interesting note: Julie, in addition to her regular job, is also an artist and had shown me two of her paintings at Jim's house. Both charming and very colorful. But she has never seen my art - so I think she was very brave to let me have her drawing.I had a great time making the quilt. It is the exact size of the original drawing. Of course I had complete freedom to add color since it had none to start with. The first draft colorwise had a green face - but that was really ugly and sort of scary looking. You can see from this photo that before the stitching, it was really hard to distinguish the face from the background.
Here is the piece with the initial stitching done - looks a LOT better.
.jpg)
And here is the quilt - all done and ready to give to Julie. Here is a secret: I love love love this quilt and it will be hard to send it on its way. But isn't that just the greatest compliment to a quilt? That you love it when it is done? barbara
Monday, November 12, 2012
FACE It - Art Quilt Fun
Can you believe that I taught two different classes in two different towns within one week? What fun! This one was called Face It - Art Quilt Fun at Sew Unique in Mountain Home. Much closer to home and once again great fun. I am so tickled when I teach a class and folks have a good time and enjoy themselves trying something that they have never tried before.
The sample for this class was Alyssa (shown to the right). Check out this blog for July 3, 2012 for more photos of this quilt in progress.
The process for construction was taking unfused fabric scraps (unusual for me) and cutting them into approximate shapes to form the face shape. Then tiny little bits of glue hold the pieces together until the whole thing is fused in place.
Quilting the edges of every single piece is the next step and requires diligence and determination - especially if you actually bury every thread end. But the overall look is that of a fabric jigsaw puzzle.
As always I was just so impressed by the work that the students did (shown below). The colors and combinations of fabric they selected were just a wonderful Visual Feast! Am I just lucky to get great students or what???
And of course one of the really great things about teaching a class at a fabric store is that we got to carry around the faces to find the PERFECT background fabric. Much more fun that just having your own fabric stash at home to choose from!
The sample for this class was Alyssa (shown to the right). Check out this blog for July 3, 2012 for more photos of this quilt in progress.
The process for construction was taking unfused fabric scraps (unusual for me) and cutting them into approximate shapes to form the face shape. Then tiny little bits of glue hold the pieces together until the whole thing is fused in place.
Quilting the edges of every single piece is the next step and requires diligence and determination - especially if you actually bury every thread end. But the overall look is that of a fabric jigsaw puzzle.
As always I was just so impressed by the work that the students did (shown below). The colors and combinations of fabric they selected were just a wonderful Visual Feast! Am I just lucky to get great students or what???
And of course one of the really great things about teaching a class at a fabric store is that we got to carry around the faces to find the PERFECT background fabric. Much more fun that just having your own fabric stash at home to choose from!
Aren't these faces just wonderful? Of course they are still at the stage I call the "ugly stage" because the quilting adds such amazing detail and definition. I really hope that I get to see the finished quilts some day. barbara
Monday, November 5, 2012
Traveling to teach a class
![]() |
| Clarksville Class Photo - Gorgeous! |
![]() |
| Me teaching. |
The class that I taught was using fusible scraps to make a face on a 12 inch square. I provided all of the materials and some samples to get folks started. One thing that I am aware of as a teacher (because I did the VERY same thing when I was starting) is that folks who aren't already wild and crazy art quilters will make very tiny little faces on the 12 inch square if left to their own devices. So I provide "face shapes" in approximately the right size so that they can be assured of success in their design.And then the FUN starts. I have scads of already fused scraps and I dump piles of them on each working table and the ladies (and gentlemen) begin to design their faces. All pieces are removable and replaceable until they are fused so it is a Guaranteed Success class.
And I was not disappointed. The members of the class were incredibly CREATIVE and WHIMSICAL and made beautiful faces - which you can see in this posting. Aren't they great? I hope that I get to see some of the finished pieces once they are quilted and embellished.
And I found out that I really really like teaching - so I am going to do it again SOON! barbara
Subscribe to:
Posts (Atom)
.jpg)


.jpg)


.jpg)

.jpg)
.jpg)
.jpg)
.jpg)
.jpg)
.jpg)


.jpg)
.jpg)
.jpg)
.jpg)
.jpg)
.jpg)
.jpg)


.jpg)
.jpg)

.jpg)
.jpg)
.jpg)
.jpg)
.jpg)
.jpg)
.jpg)
.jpg)
.jpg)
.jpg)
.jpg)
.jpg)
.jpg)
.jpg)